模块
模块是单一的,通常一个模块对应一个具体的业务
新模块的创建
创建模块:nest g mo new -d
-d表示虚拟创建,返回创建的结果,实际不创建,如果要实际创建,将-d去掉即可就会在根路径下创建新模块:
src/new/new.module.ts
new.module.ts文件的具体内容为:tsimport { Module } from '@nestjs/common'; @Module({}) export class NewModule {}并在根模块中进行导入更新了这个新模块,
app.module.ts的内容为:tsimport { Module } from '@nestjs/common'; import { AppController } from './app.controller'; import { NewModule } from './new/new.module'; @Module({ imports: [NewModule], controllers: [AppController], providers: [AppService], }) export class AppModule {}
模块本身是干不了活的,需要搭配控制器中的路由和业务服务才能实现效果
创建一个服务:nest g s new --no-spec -d 生成src/new/new.service.ts服务提供者文件
在new.module.ts文件中,系统会自动的将这个新建的服务放到同目录下的模块中:
import { Module } from '@nestjs/common';
import { NewService } from './new.service';

@Module({
    providers: [NewService], // 新建的服务已经注册到这个模块中,作用域是这个模块,在其他模块中不能使用
})
export class NewModule {}我们可以按照这样的方式在创建一个test模块,这样系统中就有一个根模块和两个其他模块
之后,我们创建控制器:nest g co new --no-spec -d 生成src/new/new.controller.ts控制器文件:
import { Controller } from '@nestjs/common';

@Controller('new')
export class NewController {}
同时控制器会被添加到对应的同文件夹中的模块中:
import { Module } from '@nestjs/common';
import { NewService } from './new.service';
import { NewController } from './new.controller';

@Module({
    providers: [NewService],
    controllers: [NewController],
})
export class NewModule {}
控制器中可以添加方法:
import { Controller, Get } from '@nestjs/common';

@Controller('new')
export class NewController {
    @Get()
    show() {
        return 'new show method';
    }
}这样我们就可以通过网页地址栏进行访问:localhost:3000/new,网页中显示的结果是new show method
但是我们一般不将业务的方法放到控制器中,我们一般在控制器中存放路由即可,使用路由去服务提供者中查找具体的方法,从而进行调用
模块间的调用
服务是有具体的模块作用域的,但是不同的模块间是可以互相依赖的,如果一个模块想要使用其他模块的服务,我们将其他模块导入即可:
import { Module } from '@nestjs/common';
import { NewService } from './new.service';
import { NewController } from './new.controller';
import { TestModule } from './../test/test.module';

@Module({
    imports: [TestModule],
    providers: [NewService],
    controllers: [NewController],
})
export class NewModule {}Test模块有其作用域内的服务,test.service.ts的内容为:
import { Inject, Injectable } from '@nestjs/common';

@Injectable()
export class TestService {
  get(): string {
    return 'test show method';
  }
}我们需要将提供服务的模块进行接口的开发,这样其他模块才可以使用该模块中的所有服务,为TestModule模块开放接口,test.module.ts修改为:
import { Module } from '@nestjs/common';
import { TestService } from './test.service';

@Module({
    providers: [
       TestService,
       {
           provide: 'test',
           useValue: '测试服务值',
       }
    ],
    exports: [TestService, 'test']    // 开放服务,将两个服务都暴露出去
})
export class NewModule {}这样在New模块控制器中就可以使用Test模块中的服务了:
import { Controller, Get, Inject } from '@nestjs/common';
import { TestService } from './../test/test.service';

@Controller('new')
export class NewController {
    constructor(private readonly test: TestService,
                @Inject('test') private testValue: string) {}
    @Get()
    show() {
        return this.test.get() + this.testValue;
    }
}通过网页地址栏进行访问:localhost:3000/new,网页中显示的结果是test show method测试服务值
New模块成功的使用了Test模块中的服务和基本类型数据
全局模块的注册
我们可以将模块注册成全局模块,需要使用@Global()装饰器进行全局的声明,在要进行全局注册的模块中进行声明,对Test模块进行全局注册:
import { Global, Module } from '@nestjs/common';
import { TestService } from './test.service';

@Global()
@Module({
    providers: [
       TestService,
       {
           provide: 'test',
           useValue: '测试服务值',
       }
    ],
    exports: [TestService, 'test']    // 开放服务,将两个服务都暴露出去
})
export class NewModule {}
不管是不是全局的模块,都需要在模块中将接口暴露出来
声明全局之后,其他模块在调用该模块服务时,就不用进行imports导入了:
import { Module } from '@nestjs/common';
import { NewService } from './new.service';
import { NewController } from './new.controller';
import { TestModule } from './../test/test.module';

@Module({
    providers: [NewService],
    controllers: [NewController],
})
export class NewModule {}在New模块控制器中还是可以使用Test模块中的服务:
import { Controller, Get, Inject } from '@nestjs/common';
import { TestService } from './../test/test.service';

@Controller('new')
export class NewController {
    constructor(private readonly test: TestService,
                @Inject('test') private testValue: string) {}
    @Get()
    show() {
        return this.test.get() + this.testValue;
    }
}通过网页地址栏进行访问:localhost:3000/new,网页中显示的结果是test show method测试服务值
New模块成功的使用了Test模块中的服务和基本类型数据
管理配置模块
我们一般会编写一个模块来管理我们的基本配置
我们一般在src根目录中创建一个文件夹configure,这个文件夹专门用来管理我们的常用配置项,具体的配置项database.ts所示:
export default () => ({
    database: {
        host: 'localhost'
    }
})
这些配置项来供我们的服务进行读取,我们创建一个配置项模块和服务:
- 创建
config模块:nest g mo config -d - 创建一个配置项服务:
nest g s config --no-spec -d
服务处理模块一般不写控制器,我们使用根控制器进行控制即可
配置项服务的任务要求是要能够读取配置项文件夹configure中的全部配置文件,config.service.ts内容为:
import { Injectable } from '@nestjs/common';
import { readdirSync } from 'fs';
import path from 'path';

@Injectable()
export class ConfigService {
    // 将数据存储到属性
    config = {} as any;
    // 构造函数中写配置项,先进行读取,在把值进行填入到config中
    constructor() {
        // 定义路径
        const options = { path: path.resolve(__dirname, '../configure') }
        // 读取文件夹下的所有配置文件,readdirSync表示同步读取
        readdirSync(options.path).map(async (file) => {
            if (file.slice(-2) === 'js') {
                // 加载模块,路径连接上文件名称
                const module = await import(path.resolve(options.path, file))
                // 使用点语法进行合并,不同配置文件内容的追加
                // module.default()执行默认导出函数,得到数据
                this.config = { ...this.config, ...module.default() }
            }
        })
    }
    get() {
        return this.config.database.host;
    }
}
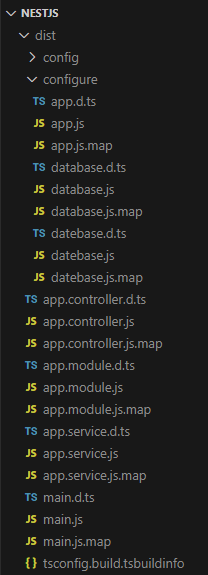
NestJs后端在编译运行的时候,会生成dist文件目录,加载的是该目录中的内容
如果,修改代码之后,刷新后网页没有效果,我们可以把
dist文件删除掉,重新运行后端
根模块控制器中调用配置项模块服务的代码,如app.controller.ts所示:
import { Controller, Get } from '@nestjs/common';
import { ConfigService } from './config/config.service';

@Controller()
export class AppController {
  constructor(private readonly config: ConfigService) {}

  @Get()
  getHello() {
    return this.config.get();
  }
}
使用这个服务,在网页中地址栏中输入:
localhost:3000,我们就可以在网页中读到对应配置文件中的值:localhost
服务开启时,会将我们定义的模块全部进行实例化出来,包括模块中的服务,实例化过程中,其内部的构造函数都会被执行,如果构造函数中有打印信息,会在后台进行打印
静态的配置项模块:模块是不可定制的,是静态的,如果要使用这个模块,直接imports: [ConfigModule]倒入进来即可,配置项文件只能放到configure里面,不能放到其他位置
优化管理配置项模块
我们需要对管理配置项模块进行进一步的优化,在请求的时候传入database.host,就可以得到其配置项中的内容,对于config.service.ts文件做如下的修改:
import { Injectable, Optional } from '@nestjs/common';
import { readdirSync } from 'fs';
import path from 'path';

@Injectable()
export class ConfigService {
    constructor(@Optional() private config = {}) {
        const options = { path: path.resolve(__dirname, '../configure') }
        readdirSync(options.path).map(async (file) => {
            if (file.slice(-2) === 'js') {
                const module = await import(path.resolve(options.path, file))
                this.config = { ...this.config, ...module.default() }
            }
        })
    }
    get(path: string) {
        return path.split('.').reduce((config, name) => {
            return config[name]
        }, this.config)
    }
}
我们定义的配置项:
config = {} as any;,但是,一般情况下参数的声明都在constructor构造函数中进行编写:constructor(private config = {}),但是这样写是不行的,因为顶部有装饰器@Injectable(),系统会将constructor构造函数中的内容当作服务来看待,系统会尝试的进行依赖注入,为了解决这个情况,需要使用装饰器@Optional()来告诉系统,这里需要使用默认值
get函数可以简化为:tsget(path: string) { return path.split('.').reduce((config, name) => config[name], this.config) }这个简化是箭头函数的简化
根模块控制器中调用配置项模块服务的代码,如app.controller.ts所示:
import { Controller, Get } from '@nestjs/common';
import { ConfigService } from './config/config.service';

@Controller()
export class AppController {
  constructor(private readonly config: ConfigService) {}

  @Get()
  getHello() {
    return this.config.get('database.host');
  }
}
使用这个服务,在网页中地址栏中输入:
localhost:3000,我们就可以在网页中读到对应配置文件中的值:localhost
动态模块
动态模块可以使模块可以进行动态的配置,可以修改配置项文件的目录,还是可以进行配置项内容的加载
动态模块的思路就是可以进行传参,我们需要设计方法进行传参,在config.module.ts模块中定义静态方法:
import { DynamicModule, Module } from '@nestjs/common';
import { ConfigService } from './config.service';

@Module({
  providers: [ConfigService],
  exports: [ConfigService],
})

export class ConfigModule {
    // 定义静态方法来调用一个动态模块
    static register(options: { name: string }): DynamicModule {
        return {
            module: ConfigModule,    // 模块必须加上
            providers: [{ provide: 'my', useValue: options.name }],  // 定义一个服务
            exports: ['my']    // 暴露服务
        }
    }
}
动态服务的写法与在
@Module装饰器中的写法完全一样,需要额外的加上module: ConfigModule模块指定;动态服务写法的好处是我们可以为其加上参数
在根模块app.module.ts中导入的时候,需要动态的调用这个静态方法:
import { Module } from '@nestjs/common';
import { AppController } from './app.controller';
import { AppService } from './app.service';
import { ConfigModule } from './config/config.module';

@Module({
  imports: [ConfigModule.register( { name: 'jlc' } )],
  controllers: [AppController],
  providers: [AppService],
})
export class AppModule {}
我们可以为这个静态方法传递参数
我们可以在根控制器app.controller.ts中注册服务:
import { Controller, Get, Inject } from '@nestjs/common';

@Controller()
export class AppController {
  constructor(@Inject('my') private my: string) {}

  @Get()
  getHello() {
    return this.my;
  }
}
在网页中输入
localhost:3000,结果显示:jlc,成功接收到了静态函数传递的值
动态的加载配置项模块
我们可以修改存放配置项文件文件夹的名称,当传入修改后的文件名即可重新加载配置项内容,实现动态的加载配置项模块,核心就是传入和接收具体的配置项文件夹的路径
在根模块app.module.ts文件下,进行如下的修改:
import { Module } from '@nestjs/common';
import { AppController } from './app.controller';
import { AppService } from './app.service';
import { ConfigModule } from './config/config.module';
import path from 'path';

// 将配置项文件夹的路径抽离出来,configure为当前配置项文件的名称
const configPath = path.resolve(__dirname, './configure')

@Module({
  imports: [ConfigModule.forRoot( { path: configPath } )],
  controllers: [AppController],
  providers: [AppService],
})
export class AppModule {}
如果配置项文件名称发生了修改,我们只需对
configPath中的路径名称进行修改即可,实现配置项模块的动态加载
配置项模块config.module.ts文件,设计静态方法来动态的接收传入的路径参数
import { DynamicModule, Module } from '@nestjs/common';
import { ConfigService } from './config.service';

@Module({
  providers: [ConfigService],
  exports: [ConfigService],
})

export class ConfigModule {
    static forRoot(options: { path: string }): DynamicModule {
        return {
            global: true,
            module: ConfigModule,
            providers: [{ provide: 'CONFIG_OPTIONS', useValue: options }],
        }
    }
}
全局模块的注册,也可以使用上述的方式进行注册,不单单只是使用装饰器进行注册
配置项服务config.service.ts,我们要根据传入的参数,进行配置项内容的读取:
import { Inject, Injectable, Optional } from '@nestjs/common';
import { readdirSync } from 'fs';
import path from 'path';

@Injectable()
export class ConfigService {
    constructor(@Inject('CONFIG_OPTIONS') options: { path: string }, @Optional() private config = {}) {
        readdirSync(options.path).map(async (file) => {
            if (file.slice(-2) === 'js') {
                const module = await import(path.resolve(options.path, file))
                this.config = { ...this.config, ...module.default() }
            }
        })
    }
    get(path: string) {
        return path.split('.').reduce((config, name) => {
            return config[name]
        }, this.config)
    }
}