Web环境的集成
在Spring实际的开发中,有三层基本架构环境:dao层、Service层和Web层
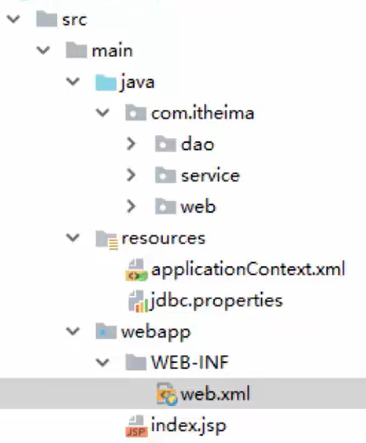
环境的基本搭建
在一个具体的项目模块中,其具体的代码文件结构如下所示:
对于Web层,我们需要通过Spring与Web环境进行集成,因此,在Web层中,要使用相应的Web层组件,使用这些组件,我们首先需要进行坐标的添加,在pom.xml文件中添加:
<dependency>
    <groupId>org.springframework</groupId>
    <artifactId>spring-context</artifactId>
    <version>5.0.5.RELEASE</version>
</dependency>
<dependency>
	<groupId>javax.servlet</groupId>
    <artifactId>javax.servlet-api</artifactId>
    <version>3.0.1</version>
    <scpoe>provided</scpoe>
</dependency>
<dependency>
	<groupId>javax.servlet.jsp</groupId>
    <artifactId>javax.servlet.jsp-api</artifactId>
    <version>5.2.1</version>
    <scpoe>provided</scpoe>
</dependency>
使用原始注解的方式进行优化:
编写
Dao接口和实现类(创建Bean)在
src/main/java文件夹中创建接口javapackage com.jlc.dao; public interface UserDao { public void save(); }为这个接口创建对应的实现:
javapackage com.jlc.dao.impl; import com.jlc.dao.UserDao; @Repository("userDao") public class UserDaoImpl implements UserDao { // 实现接口的save方法 public void save() { System.out.println("save running"); } }创建业务层(
Service)的代码:在src/main/java文件夹中创建:javapackage com.jlc.service; // 声明业务层的接口 public interface UserService { public void save(); }为接口创建一个实现:
javapackage com.jlc.service.impl; import com.jlc.service.UserService; @Service("userService") public class UserServiceImpl implements UserService { @Autowired // 表示自动注入 @Qualifier("userDao") // 依赖注入,按照id的值从容器中进行匹配的,此处的@Qualifier必须结合@Autowired一起进行使用 private UserDao userDao; public void save() { userDao.save(); // 调用userDao的save()方法 } }这事
Spring配置文件applicationContext.xml中的<bean>内容可以进行删除,同时要告知Spring使用了注解的方式xml<?xml version="1.0" encoding="UTF-8"?> <beans xmlns="http://www.springframework.org/schema/beans" xmlns:xsi="http://www.w3.org/2001/XMLSchema-instance" xmlns:context="http://www.springframework.org/schema/context" xsi:schemaLocation="http://www.springframework.org/schema/beans http://www.springframework.org/schema/beans/spring-beans.xsd http://www.springframework.org/schema/context http://www.springframework.org/schema/context/spring-context.xsd"> <!--配置组件扫描--> <context:component-scan base-package="com.jlc"></context:component-scan> </beans>在
src/main/java中添加一个Web层:javapackage com.jlc.web; import javax.servlet.http.HttpServlet; public class UserServlet extends HttpServlet { // 继承HttpServlet类 protected void doGet(HttpServletRequest req, HttpServletResponse resp) throws Exception { ApplicationContext app = new ClassPathXmlApplicationContext("applicationContext.xml"); UserService userService = app.getBean(UserService.class); userDao.save(); // 调用save()方法 } }在
web.xml配置文件中进行配置:xml<?xml version="1.0" encoding="UTF-8"?> <web-app version="3.0" xmlns="http://java.sun.com/xml/ns/javaee" xmlns:xsi="http://www.w3.org/2001/XMLSchema-instance" xsi:schemaLocation="http://java.sun.com/xml/ns/j2ee http://java.sun.com/xml/ns/j2ee/web-app_2_4.xsd"> <servlet> <servlet-name>UserServlet</servlet-name> <servlet-class>com.jlc.web.UserServlet</servlet-class> </servlet> <!--进行映射配置--> <servlet-mapping> <servlet-name>UserServlet</servlet-name> <url-pattern>/userServlet</url-pattern> </servlet-mapping> </web-app>配置完
Web层后,我们的工程要在Web环境下进行测试,需要通过http的协议去访问将模块发布到
Tomcat8-->Edit Configuratios...-->Deployment-->+-->Artifacts-->模块文件名_mvc:war exploded-->OK配置完后,点击右上角的启动按钮,之后再浏览器中输入
localhost:8080/userServlet,回车,就可以在控制台看到输出的save running这一个过程就实现了
Web层调用Service层,Service层调Dao层
ApplicationContext应用上下文获取方式
在Web层的具体代码中:
package com.jlc.web;

import javax.servlet.http.HttpServlet;

public class UserServlet extends HttpServlet {  // 继承HttpServlet类
    protected void doGet(HttpServletRequest req, HttpServletResponse resp) throws Exception {
        ApplicationContext app = new ClassPathXmlApplicationContext("applicationContext.xml");
        UserService userService = app.getBean(UserService.class);
        userDao.save();  // 调用save()方法
    }
}应用上下文对象是通过new ClassPathXmlApplicationContext(Spring配置文件)的方式获取的,但是每次从容器中获得Bean时都要编写new ClassPathXmlApplicationContext(Spring配置文件),这样的缺点是配置文件要被加载多次,应用上下文对象会被创建多次,会影响性能
在Web项目中,可以使用ServletContextListener监听Web应用的启动,我们可以在Web应用启动时,就加载Spring配置文件,创建应用上下文对象ApplicationContext,在将其存储到最大的域中(ServletContext域中),这样就可以在Web层的任意位置都可以域中获得应用上下文ApplicationContext对象了
自定义监听器
在src/main/java中创建listener包,用于加载应用上下文
package com.jlc.listener;

import javax.servlet.ServletContextEvent;
import javax.servlet.ServletContextListener;

public class ContextLoaderListener implements ServletContextListener {
    // 上下文初始化的方法
    public void contextInitialized(ServletContextEvent servletContextEvent) {
        ServletContext servletContext = ServletContextEvent.getServletContextEvent();
        // 读取web.xml中的全局参数,使访问的配置文件可以解耦合
        String contextConfigLocation = servletContext.getInitParameter("contextConfigLocation");
        ApplicationContext app = new ClassPathXmlApplicationContext(contextConfigLocation);
        // 将创建的Spring的应用上下文对象存储到ServletContext域中
        servletContext.setAttribute("app", app);
    }
}创建工具,传入上下文对象,返回app对象,在listener包下创建:
package com.jlc.listener;

import org.springframework.context.ApplicationContext;
import javax.servlet.ServletContext;

public class WebApplicationContextUtils {
    public static ApplicationContext getWebApplicationContext(ServletContext servletContext) {
        return (ApplicationContext) servletContext.setAttribute("app");
    }
}在web.xml配置文件中进行监听器的配置:
<?xml version="1.0" encoding="UTF-8"?>
<web-app version="3.0"
    xmlns="http://java.sun.com/xml/ns/javaee"
    xmlns:xsi="http://www.w3.org/2001/XMLSchema-instance"
    xsi:schemaLocation="http://java.sun.com/xml/ns/j2ee
        http://java.sun.com/xml/ns/j2ee/web-app_2_4.xsd">
    <!--全局初始化参数-->
    <context-param>
        <param-name>contextConfigLocation</param-name>
        <param-value>applicationContext.xml</param-value>
    </context-param>
    <servlet>
        <servlet-name>UserServlet</servlet-name>
        <servlet-class>com.jlc.web.UserServlet</servlet-class>
    </servlet>
    <servlet-mapping>
        <servlet-name>UserServlet</servlet-name>
        <url-pattern>/userServlet</url-pattern>
    </servlet-mapping>
    <!--监听器的配置-->
    <listener>
        <listener-class>com.jlc.listener.ContextLoaderListener</listener-class>
    </listener>
</web-app>在Web层中使用的修改:
package com.jlc.web;

import javax.servlet.http.HttpServlet;
import com.jlc.listener.WebApplicationContextUtils;

public class UserServlet extends HttpServlet {  // 继承HttpServlet类
    protected void doGet(HttpServletRequest req, HttpServletResponse resp) throws Exception {
        ServletContext servletContext = this.getServletContext();
        ApplicationContext app = WebApplicationContextUtils.getWebApplicationContext(servletContext);
        UserService userService = app.getBean(UserService.class);
        userDao.save();  // 调用save()方法
    }
}Spring系统提供的监听器
对于自定义监听器的实现代码,Spring系统提供了系统的封装,Spring提供了一个监听器ContextLoaderListener就是对上述自定义监听器的封装,该监听器内部加载Spring配置文件,创建应用上下文对象,并存储到ServletContext域中,并提供了一个客户端工具WebApplicationContextUtils供使用者获得应用上下文对象
有了Spring系统提供的监听器,我们只需完成两件事:
在
web.xml中配置ContextLoaderListener监听器首先,在
pom.xml配置文件中导入spring-web坐标xml<dependency> <groupId>org.springframework</groupId> <artifactId>spring-web</artifactId> <version>5.0.5.RELEASE</version> </dependency>在
web.xml配置系统提供的监听器:xml<?xml version="1.0" encoding="UTF-8"?> <web-app version="3.0" xmlns="http://java.sun.com/xml/ns/javaee" xmlns:xsi="http://www.w3.org/2001/XMLSchema-instance" xsi:schemaLocation="http://java.sun.com/xml/ns/j2ee http://java.sun.com/xml/ns/j2ee/web-app_2_4.xsd"> <!--全局初始化参数--> <context-param> <param-name>contextConfigLocation</param-name> <param-value>classpath:applicationContext.xml</param-value> </context-param> <servlet> <servlet-name>UserServlet</servlet-name> <servlet-class>com.jlc.web.UserServlet</servlet-class> </servlet> <servlet-mapping> <servlet-name>UserServlet</servlet-name> <url-pattern>/userServlet</url-pattern> </servlet-mapping> <!--系统监听器的配置--> <listener> <listener-class>org.springframework.web.context.ContextLoaderListener</listener-class> </listener> </web-app>使用
WebApplicationContextUtils获取应用上下文对象ApplicationContextjavapackage com.jlc.web; import javax.servlet.http.HttpServlet; import com.jlc.listener.WebApplicationContextUtils; public class UserServlet extends HttpServlet { // 继承HttpServlet类 protected void doGet(HttpServletRequest req, HttpServletResponse resp) throws Exception { ServletContext servletContext = this.getServletContext(); WebApplicationContext app = WebApplicationContextUtils.getWebApplicationContext(servletContext); UserService userService = app.getBean(UserService.class); userDao.save(); // 调用save()方法 } }